

Are you taking it to a salt flat soon ?


Are you taking it to a salt flat soon ?

Jerry;Originally Posted by Jerry

That is a good question. Last year Speed Week was completely rained out. This year the salt was in such bad condition that there was not enough good salt surface to run on safely. Potash mining has slowly been destroying the salt flats and we are very angry at the Bureau Of Land Management for allowing this to happen. We are trying to publicize the problem to get a solution (no pun) in place.
California dry lakes racers have had a problem this year with El Mirage being too wet to race on. Maybe abandoned runways may be the future- who knows?
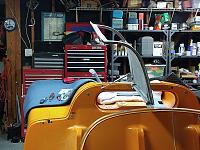
I'm busy right now getting my car ready for a big car show here in Tucson on the 17th of this month.
Regards, Neil Tucson, AZ
Regards, Neil Tucson, AZ
Wow, the quality of this build looks amazing. I hope that I can put this kind of detail into my car when I start it.
Hey, thanks for sharing the video, lots of knowledge and ideas in there! Question, those thin seats that were in the car before you went full race with it, would you happen to know who made those?
Those were the original fiberglass seat shells with vinyl upholstery supplied by Manta Cars, Dave.
My YouTube video about restoring Manta 2 might be helpful, too.
Regards, Neil Tucson, AZ
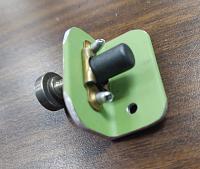
I've been considering something to hold my driver's side gull-wing door in the raised position after I manually push it open. I have a support rod that can hold it open but I can't raise it from the driver's seat, only from the outside. Initially I thought about using a gas spring and may try one yet but I found another way to do the job.
A straight helical-wound spring has lots of stiffness in compression but if it is pushed sideways, it collapses rather easily. Some clever individual seized upon this principle to create a purely mechanical hold-open. I ordered an all-stainless spring assembly from a marine hardware company for about $20 and gave it a try. I had to remove the lower end attachment for my application and make a bracket that would fit without interference. I had a piece of 3/4" aluminum angle and mounted a floating nut plate in one leg to receive a 10-32 oddball fastener I had. This fastener fits through the lower spring loop end. Both end attachments are riveted in place, as is the nut plate. The nut plate needed small diameter rivets (a #40 hole) and I had a bag of that size Cherry rivets. They were slightly too long a grip length but since they only held the nut plate in place, I would go ahead and use them. The upper end uses 3/16" rivets into the door.
The spring holds the door up nicely and when I push the spring sideways slightly, it goes down. On the downside, the placement results in the curved spring hanging down further than I'd like. I may move it to the rear edge of the door if it won't interfere with my helmet.
One thing more- when working on fabricated parts, de-burr all holes and break sharp edges (this is just basic metalwork) but I recommend also radiusing all those square corners. The corners add no strength but they do add weight and they lie in wait for the unwary. If you've never gashed yourself on a sharp corner when working on your car, it's only a matter of time before you do. Use a belt sander to round off the corners and then break the edges with a file. It looks better, too.
Regards, Neil Tucson, AZ
Here's what I decided to go with, your doors might be heavier since it looks to be joined top/bottom so you'd probably have to move the mount further out on the door and you'd have to figure out the gas spring force, mine is working with a 30N but you may want more force I think.

 Reply With Quote