Page 3 of 9 FirstFirst 12345 ... LastLast
Results 21 to 30 of 89

Thread: Dave Bivens Mirage Build

  1. #21
    Champion Member Manta22's Avatar
    Join Date
    Jul 2014
    Location
    Tucson, AZ
    Posts
    124
    That panel across the underside of your chassis will improve its torsional stiffness, provided that it is securely riveted or welded in place.
    Regards, Neil Tucson, AZ

  2. #22
    Champion Member Blueovalz's Avatar
    Join Date
    Jul 2014
    Location
    Little Rock, AR
    Posts
    279
    I agree. I added a .125" aluminum sheet under everything forward of the engine. I have another piece for under the engine, but with all the heat in the back, and wanting to gain full visuals of the mechanicals back there in time of need, I chose to leave it off. Yeah, it was about 45 lbs, which accounts for one of many little things that have made the car stretch well beyond 2100lbs. What helps offset that angst, is added peace of mind in protecting the underside of my britches, a smooth, raked underbelly for some downforce, added chassis rigidity, and a barrier to water (not that I drive around in any adverse weather).

    I'm sure you've thought of this, but will say it anyway. Don't forget to drill and occasional small drain hole for any fluid that may find its way onto this panel (specifically coolant). I drilled mine immediately next to the framing corners so that normal forces of driving push the fluid toward the holes, and makes it detectable if it's a slow leak.
    Last edited by Blueovalz; 02-01-2021 at 09:34 PM.

  3. #23
    Pole Position Member
    Join Date
    Aug 2018
    Location
    Houston, Tx
    Posts
    83
    Drain Holes, very good idea! thanks

  4. #24
    Pole Position Member
    Join Date
    Aug 2018
    Location
    Houston, Tx
    Posts
    83
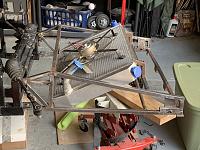
    Adding more build details, wasn't happy with how the front frame that holds the radiator and from clip attaches to the main frame, so I added a bit of strength, triangulated the mount, the way the radiator is mounted is also visible, ignore that pipe coming out of the radiator, that will be changed of course.
    Click image for larger version. 

Name:	20181124_091517.jpg 
Views:	15 
Size:	94.9 KB 
ID:	1173Click image for larger version. 

Name:	20181216_120128.jpg 
Views:	15 
Size:	85.6 KB 
ID:	1174Click image for larger version. 

Name:	20181223_190447.jpg 
Views:	13 
Size:	88.7 KB 
ID:	1175Click image for larger version. 

Name:	20181227_174721.jpg 
Views:	15 
Size:	91.1 KB 
ID:	1176Click image for larger version. 

Name:	IMG_0796.jpg 
Views:	16 
Size:	20.6 KB 
ID:	1177

  5. #25
    Pole Position Member
    Join Date
    Aug 2018
    Location
    Houston, Tx
    Posts
    83
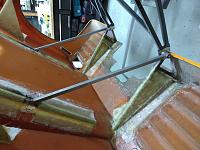
    Here's how the front body section gets secured to the front frame, I added a fibreglass framing piece, glued and glassed to the inner section,
    Click image for larger version. 

Name:	20181124_124228.jpg 
Views:	9 
Size:	92.4 KB 
ID:	1178Click image for larger version. 

Name:	20181124_103750.jpg 
Views:	9 
Size:	94.8 KB 
ID:	1179Click image for larger version. 

Name:	20181125_213531.jpg 
Views:	9 
Size:	96.7 KB 
ID:	1180Click image for larger version. 

Name:	20181125_213621.jpg 
Views:	8 
Size:	94.4 KB 
ID:	1181

  6. #26
    Pole Position Member
    Join Date
    Aug 2018
    Location
    Houston, Tx
    Posts
    83
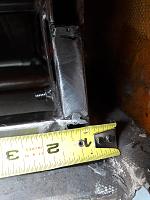
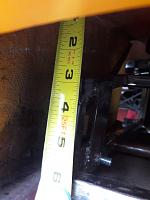
    and here the bolt thru the frame is visible, ignore the tape measure,
    Click image for larger version. 

Name:	20181229_141831.jpg 
Views:	6 
Size:	83.5 KB 
ID:	1182Click image for larger version. 

Name:	20181229_142055.jpg 
Views:	8 
Size:	91.5 KB 
ID:	1183

  7. #27
    Pole Position Member
    Join Date
    Aug 2018
    Location
    Houston, Tx
    Posts
    83
    ok, it's freezing outside so time to add a few more pics on progress, more on the front body section mounting, here's what the frame section looks like, I added a piece of tubing to receive the bolt threaded through the lower front section of the body (pics above) and also boxed it in,

    Click image for larger version. 

Name:	20181216_120223.jpg 
Views:	4 
Size:	89.5 KB 
ID:	1186Click image for larger version. 

Name:	20181218_202008.jpg 
Views:	5 
Size:	94.3 KB 
ID:	1187Click image for larger version. 

Name:	20181223_170725.jpg 
Views:	5 
Size:	90.1 KB 
ID:	1188

  8. #28
    Pole Position Member
    Join Date
    Aug 2018
    Location
    Houston, Tx
    Posts
    83
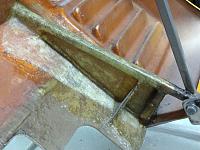
    On to the rear hatch, this made me nervous, when it's open it really bounces on the lower attaching point and where the metal mount is glassed to the rear hatch just didn't seem strong enough so I added more glass, used a double biaxial weave with mat on one side, works well for complex shapes.
    Click image for larger version. 

Name:	dblbiax with mat.jpg 
Views:	6 
Size:	93.7 KB 
ID:	1189

  9. #29
    Pole Position Member
    Join Date
    Aug 2018
    Location
    Houston, Tx
    Posts
    83
    I also added reinforcement framing going from the pivot point to the top section. I added glass to the top section before adding the square tubing. Used construction adhesive to affix the tubing to the underside of the rear hatch and also the adhesive provided a good transition from the metal to the hatch for the fiberglass I added over the tubing, pics can explain better than typing, when the hatch is closed the added support tubing lines up pretty close with the frame members going down to the pivot point.
    Click image for larger version. 

Name:	20190601_142357.jpg 
Views:	8 
Size:	89.0 KB 
ID:	1190Click image for larger version. 

Name:	20190601_142403.jpg 
Views:	7 
Size:	95.2 KB 
ID:	1191Click image for larger version. 

Name:	20190604_181205.jpg 
Views:	6 
Size:	95.2 KB 
ID:	1192Click image for larger version. 

Name:	20190605_192423.jpg 
Views:	7 
Size:	89.3 KB 
ID:	1193Click image for larger version. 

Name:	20190607_231538.jpg 
Views:	8 
Size:	93.5 KB 
ID:	1194Click image for larger version. 

Name:	20190614_185229.jpg 
Views:	7 
Size:	89.4 KB 
ID:	1195Click image for larger version. 

Name:	IMG_20201025_200426830.jpg 
Views:	7 
Size:	92.1 KB 
ID:	1196

  10. #30
    Pole Position Member
    Join Date
    Aug 2018
    Location
    Houston, Tx
    Posts
    83
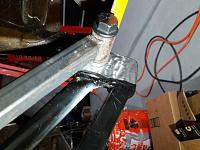
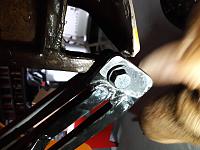
    Also, for better body alignment, I had to move the rear hatch pivot point higher, can't even see the old hole, welded in nicely, (sorry the picsare rotated, not sure how to correct that, they correct orientation in the file folder)
    Click image for larger version. 

Name:	20191123_215524.jpg 
Views:	7 
Size:	88.1 KB 
ID:	1197Click image for larger version. 

Name:	20191123_215541.jpg 
Views:	8 
Size:	88.0 KB 
ID:	1198

Posting Permissions

  • You may not post new threads
  • You may not post replies
  • You may not post attachments
  • You may not edit your posts
  •